Showing posts with label Gluten-free. Show all posts

December 16, 2013

Beans.... Sprouting and Canning

I like beans for many reason, but mainly because they are cheap, filling and healthy no matter how you choose to eat.
Buying beans in a can takes away from the value that dried beans give you, as in they are not cheap, and you risk all the additives and sodium as well.
It is so easy to prepare dried beans.  I'll repeat that for you.  IT IS EASY.  You can do it.
The thing is, there are many options in making beans.  You can use a quick method or spend days soaking and then sprouting them.  I prefer to soak and sprout and since it is time intensive, that's why when I make up a batch I make a bunch and can them.
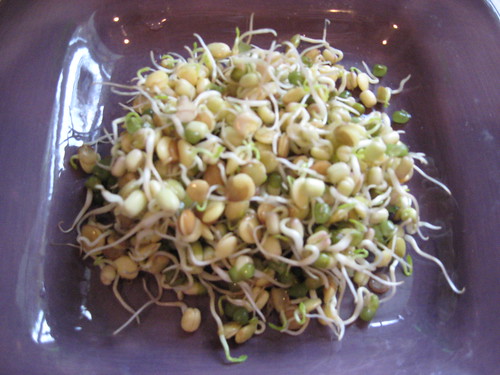
So why would you want to consider sprouting beans before using them?
Sprouting increases enzymes and activates the vitamins and minerals within the bean, seed, or grain.  Both protein and fiber increase in quality and quantity.

Like most things in life, my issue with dried beans is that I usually forget I need them until I start cooking the meal.  You can always do a quick cook, but it's nice to just be able to open a jar that I canned myself, and have them quickly ready to go.

If you homeschool, then chances are you have done the experiment where you take a bean and give it a few days under a couple of different conditions to sprout.  The one kept moist and in the dark did the best, most likely.
That's kind of where I'm going today.
When you sprout a seed or a bean, you are releasing enzymes and unlocking nutrition.  It also helps digestion as well.  (I will add that I've never had bean issues and have no GI differences between sprouting or quick cooked).

If you have ever made sprouts of any kind, the technique is the same..... soak, drain, rinse.

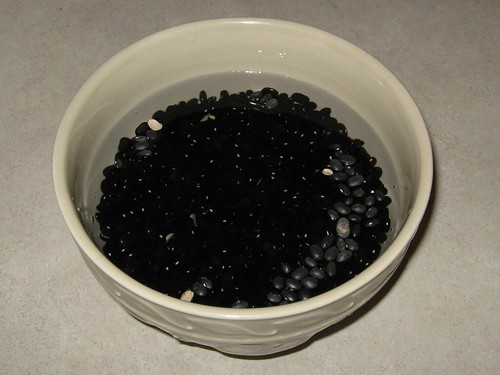
Black beans soaking
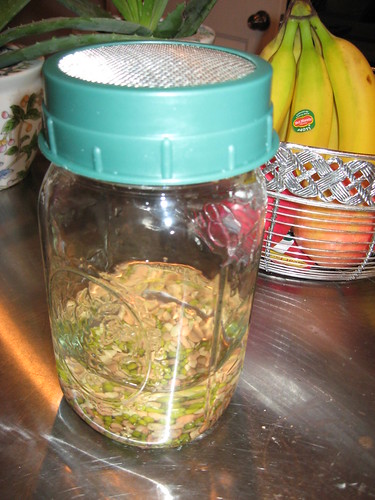
Seeds being soaked


Soak your beans or seeds in fresh, cool water overnight or for 6-8 hours.  The beans will swell and almost double in volume so make sure the bowl you use is large enough to hold the increased amount.  You might also need to add more soaking water if it all soaks into the beans.
You then want to drain and rinse the bean, grain or seed.  You will want to keep them moist, but not damp.  If you work with a smaller quantity until you get the concept down and feel comfortable, it will be easier.  For small seeds it is often easier to use a quart mason jar, for a quart or two of beans you can use a colander.  For larger amounts, like a couple of gallons, I just use a large bowl.  
Rinse the sprouts-to-be every few hours, about every 3-5 hours, with clean water.
The idea is that you want them to remain moist, but not wet.  If I have a big batch in a bowl I will rinse them more frequently so that they get moved around and are not sitting in water.
Mold is the enemy here and you don't want it to start growing.  Regular rinsing helps prohibit this.
I also usually cover with a cloth or lid so that they won't dry out.
The end point is the emergence of a root or sprout, the choice is really yours. For beans, I like to start the cooking process right when the sprout shows in most of the beans.  When they start to get long roots you will see more the hulls of the beans coming off and I just find that I prefer that product over a long sprout.


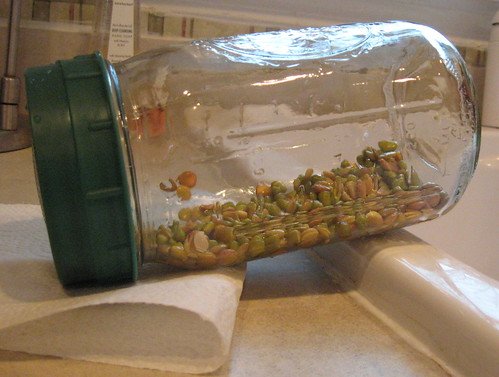
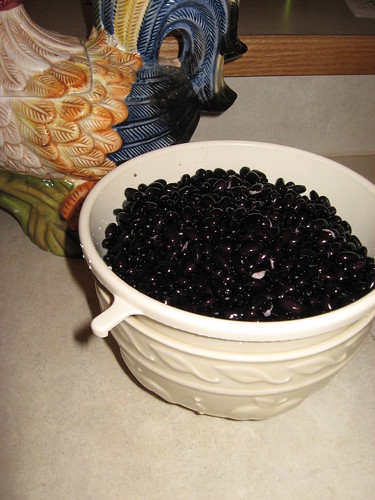
After you have sprouted, you can use or cook as needed.  Grains for baking bread will need to be ground before use.  If you want a flour, you will need dry them using the oven at a low temperature or a dehydrator.
I use the Ball Blue Book's (it's an affiliate link, but it is cheaper at walmart during canning season so buy it there instead) recipe for canning beans at this point by putting the beans in a large pot covered with water and then cooking them for 30 minutes.  This cooks them only partially and the pressure canning for 90 minutes processes them to where they are perfect every time.
If you are just trying a single batch of beans, then cook in water for about an hour or until tender.  Add salt and seasonings and then cook for another 30 minutes or so.

November 11, 2013

Turkey Confetti Quinoa- E

I've been looking back through some of my recipes here and I realize that most fall into the quick and easy category.  This seems odd to me as it feels like I spend a decent portion of my day making meals.
I do not consider myself a purist when it comes to food, but I do usually cook meals and don't take shortcuts on a daily basis.
This recipe takes a bit more preparation, and the actual recipe is pretty short and to the point.  Yes, there are ways to make it quicker and all that, but I figured instead of giving the convenience way, I'd show the homecook way.

This recipe is a version of a quinoa dish I used to make when I was a vegetarian.  Confetti Quinoa was featured in The New Laurel's Kitchen.  It's a great book if you just want to learn about cooking whole foods or bread, but this recipe needed a little something else to make it special and more of a meal.
I also realize that turkey leftovers will soon be here, and I thought, what better than to turkey-fy this vegan version?
I  found a couple of naturally lean turkey breasts on clearance at my store, and cooked them with a bit of water in the slow-cooker.  This was good not just for the meat which was pulled from the bone and cut  into small pieces, but it also gave me stock to use as well.
After the turkey cooked for a few hours till done, I strained the leftover liquid to use as turkey stock.  I just put it in the fridge for a bit so that any fat can be removed.  Now it can go in a variety of recipes (and if your stock congeals like gelatin when cold, then congratulations!  This just means that it contains collagen and is even more nutritious than you thought).  Homemade stock doesn't have to be hard or contain a bunch of ingredients.  It can be simple, but is still healthy and nutritious.

The first step involves cooking the quinoa.  It can be bitter so you want to make sure you rinse it well before cooking.  About 1 cup uncooked will yield 3 cups cooked.  You may use just water to cook the quinoa, but the turkey stock will add a better flavor (and more nutrition) to the final dish.


Turkey Confetti Quinoa-E

Makes 4 very generous servings with each having: Cal 276, carbs 41 grams, fat 7 grams, protein 15 grams.  6 servings and a side salad would also be a good E choice with a low-fat dressing. 

1 cup quinoa
3 cups turkey stock or water (or a combination of both)
1/2 tsp salt
1 tsp olive oil
1/2 red onion, chopped
1 red bell pepper, chopped
1 green bell pepper, chopped
2 cloves garlic, minced
1/4 cup water chestnuts (one small can), diced
12 oz cooked turkey, diced

  • Bring stock/water to a boil and add rinsed quinoa and salt.
  • Turn to a simmer and allow to cook over med-low heat  for about 15-20 minutes.  Stir and check as needed so that it doesn't cook dry (like you would with rice).  
  • In a large skillet, heat oil over med-high heat and saute onions, red and green bell peppers, and garlic until softened (but not mushy) for about 5-10 minutes.
  • Add the cooked quinoa, cooked turkey, and water chestnuts and stir over low heat until warmed through.  
  • Taste to check seasoning and add more salt if needed.


This post is shared with Gwen's Nest for Trim, Healthy Tuesday  and Stacy Makes Cents for Centsibly Sugar and Grain Free

September 5, 2013

Morning Sunshine!-FP

You know I love smoothies, both green and pink, but some times I'll admit that I have a hard time making myself just have one.
You see, I'm not a natural veggie or fruit eater.
Many people know me as the person who is always on them about getting in those vegetables, but in truth, it is mainly because I know I need to hear those words myself.  It's easy to focus so much on protein and grains and treats, but vegetables really should be the core to most eating plans in my opinion.  They are what make you feel full and have so much nutrition.
But making sure I get them daily is many times a struggle.

So I'll admit that I've been in a veggie funk lately.  Nothing seems good, everything tastes the same or I've eaten it a million times.
Smoothies even seem kind of old and tired.

And then I saw a new Trim, Healthy Mama drink on the facebook page.  I started to read the directions and they were soooo long and seemed to have so many steps......
Sorry, but this just isn't my style.
I need quick and to the point.

But the drink did inspire me.
Why not take a drink idea and make a smoothie?
Lemons?  No need to peel and cut and slice.  Cut it in half and throw it in is how it do it.  The seeds and peel and pith all have their value and that's part of why I have a Blendtec.
I will add that my Ninja handled whole citrus quite well too.

I also opened up my copy of the Green Smoothie Girl's book with a bunch of recipes and inspiration.
Inspiration is always a good thing, but I really just wanted simple with a little sour and a little bitter and a touch of sweet to take the edge off.

So often smoothie means greens or berries to people, but this one is a lovely, zingy gold.  Like a cup of sunshine.
I kept it Fuel Pull-FP but it might hint at Energizing-E due to the grapefruit, but 1/2 of a grapefruit makes an S-helper so I translate 1/4 as within parameters.  I also left out any protein as I wanted to make a large container to sip on for several hours and to have pre- and post- workout for electrolyte and mineral replacement.  Feel free to use it with or as a meal with the added protein.
I've also been craving bitter and sour lately, and my husband who loves smoothies, thought this was a little too sour for his tastes.  Adjust the seasonings for yours.

Morning Sunshine-FP

1/2 lemon, cut in half
1/4 grapefruit, cut in a few pieces (I do NOT peel my citrus or remove seeds before using as there is a lot of nutrition present, but feel free to do so if you like!)
1/2 tsp ground ginger
1/2 tsp ground turmeric
generous dash of Redmond RealSalt
1/2-1 tsp coconut oil
Dash of NuNaturals Pure, or a comparable stevia
1 quart filtered water
1 cup ice

Combine all in your Blendtec, or other high powered blender, and mix on Whole Juice setting or until liquified.


This smoothie is the perfect base for customizing.  Add in berries or other fruits and veggies as you have them around.
My favorite is to add in a handful of blueberries, but while you'd think yellow+blue = green, this makes a nice rosy-pink drink.


This post is shared at Stacy Makes Cents and Gwen's Nest for Trim, Healthy Tuesday.  Check her out for more great THM links!